CEP Public Page
The CEP public profile page on our site helps provide you an online presence to connect with your potential clients. This feature is only available for the CEP Pro platform plan.
Jump to section
- How To Enable My CEP Public Page
- Reserve your page URL link
- Upload your profile photo
- Edit the page content
- Include links to your various social media presence
- Include reviews provided by your clients
How To Enable My CEP Public Page
From your dashboard, go to "My CEP Page" and click "Enable Page".


Your CEP page remains hidden until you click on "Publish Page" under the Page URL tab. You can also hide your published page by clicking on "Hide Page" anytime after you have published your page.
Protip: Customise your CEP Page and view the result on the preview site first; publish your page only when you are satisfied!
To view a preview of your CEP page, click on "View Preview" under the Page URL tab. Your name, MAS Representative Number and company from your affiliate profile details will be displayed on your page. The remaining page will look plain if you have yet to customise any content.

Personalising Your CEP Page

There are quite a few areas you can personalise:
- Reserve your page URL link
- Upload your profile photo
- Edit the page content
- Include links to your various social media presence
- Include reviews provided by your clients
Reserve your page URL link
After you have published your page, you will find your unique page link in the Page URL tab. By default, it is a very long string of characters.

You can reserve your very own link name in the Page URL tab by scrolling down to the Profile Link section. It takes up to 3 business days for approval before you can start using it. The previous long link to your CEP page remains usable, it will automatically redirect to your new approved link.

The reserved name should represent your personal name and cannot be generic or misleading.
Protip: Consider reserving your page link name first while you are still customising your page.
Upload your profile photo
Go to the Photo tab to upload your profile photo. This photo will also appear as the image when sharing your page link on whatsApp and any social media platform that supports the open graph image meta tag.

Click on "Choose file", select the photo, then click on "Upload". The uploaded photo will be cropped into a square at the center.
To remove any uploaded photo, click on "Upload" without selecting any photo (e.g. you will see the text "No file chosen".
Edit the page content
Go to the Content tab to edit the contents that appear in your CEP page. You can edit your:
| 1 | Work Title |
| 2 | Credentials |
| 3 | About |
| 4 | Contact Form Greetings |
| 5 | Disclaimer |

By default, we have already pre-generated some wordings for your "Contact Form Greetings" and "Disclaimer". You can always edit them.
To style certain content or to include images, refer to Customising page with HTML.
Include links to your various social media presence
Go to the Social tab to edit what link will appear on your CEP page. Provide the full URL (i.e. https://...) to enable each icon. Leaving any URL blank will disable each icon.
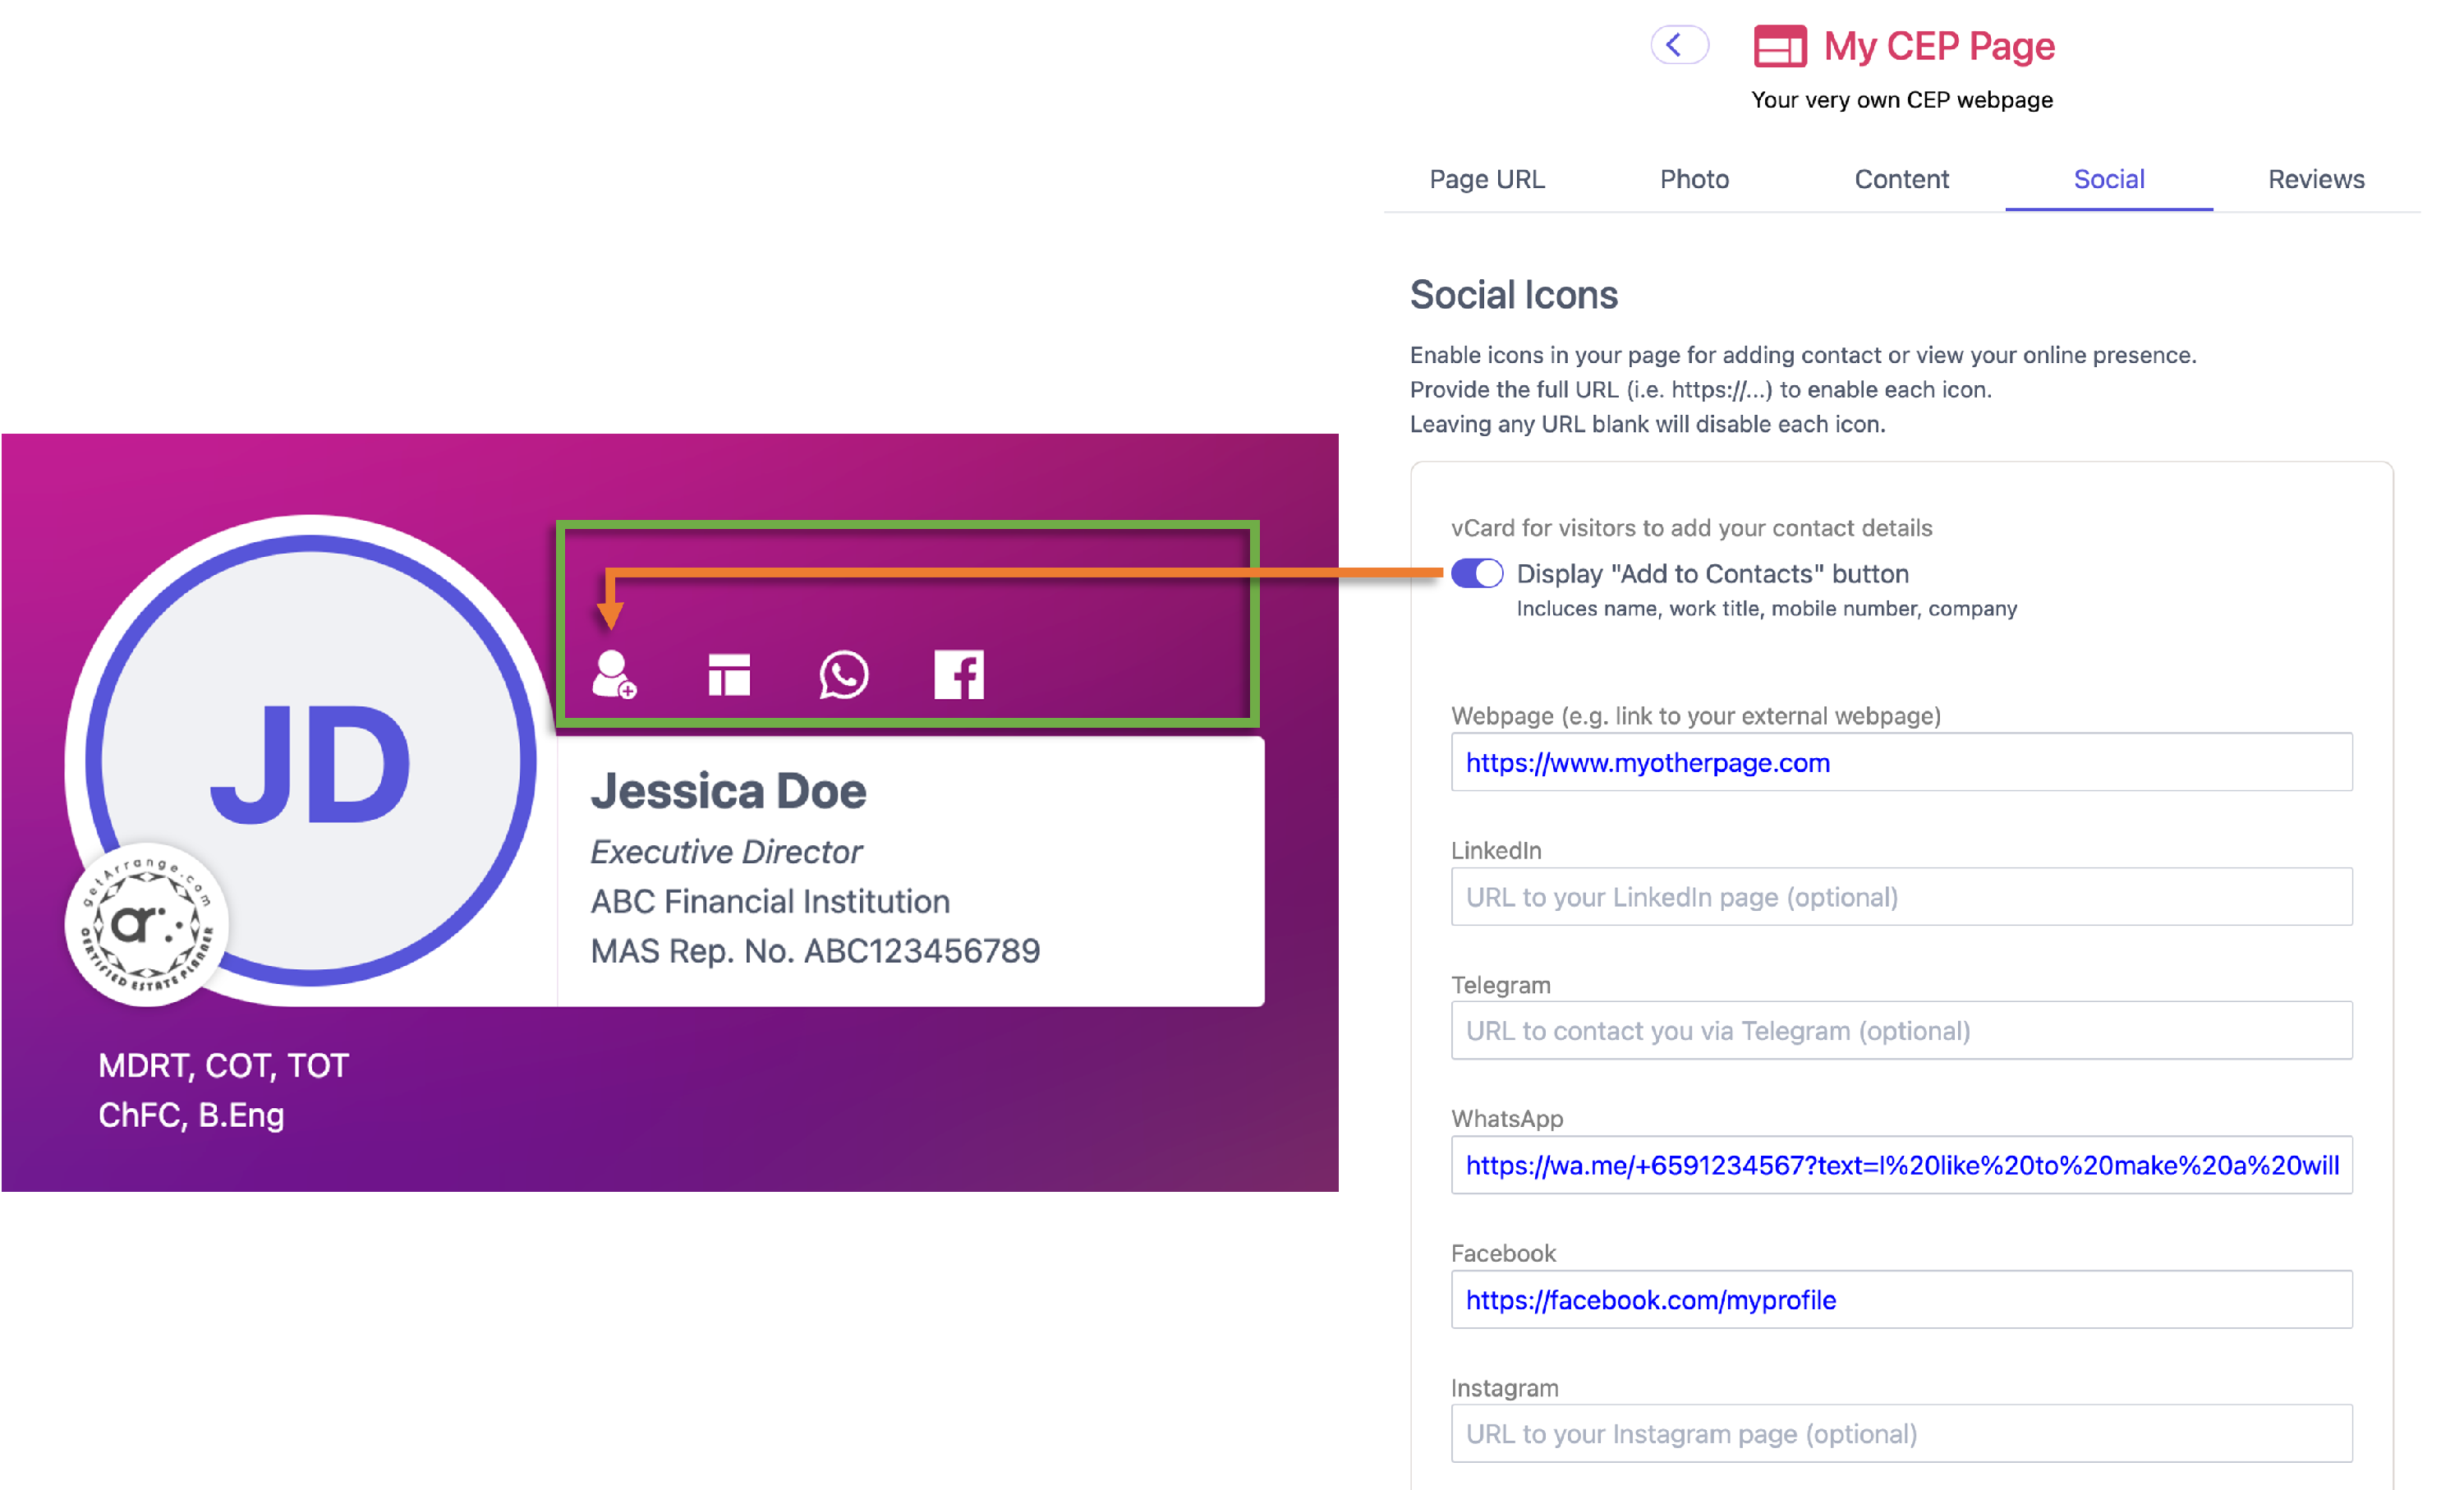
By default, the vCard is enabled so visitors can click to add your contact details to their contact list. You can always disable this. The whatsApp link with enquiry text is also automatically included. You can always edit it or delete it.
Include reviews provided by your clients
Go to the Reviews tab to include the various reviews, feedbacks from your clients to help build your online presence.

Protip: Provide a few reviews. Start each review with a summary header, followed by the review content and end off with the name and title of the person who gave you the review. You can also use emoticons.
To style certain content or to include images, refer to Customising page with HTML.